Quantcast
Channel: Moates Support
Viewing all 191 articles
Browse latest View live

Support: Information we need

$
0
0

Our support email box gets a lot of messages that are loosely of the form:

“IT DOESN’T WORK!”

Unfortunately, this does NOTHING to help us help you figure out what is going on.   The following ten questions should give you a reasonable guide to what we need to help you solve the problem at hand.  (Feel free to copy and paste this and use it verbatim as the beginning of your emails to support@moates.net )

  1. What kind of vehicle(s) ? (Year, make, model)
  2. Which engine (stock / replacement) ?
  3. Which ECM / ECU (Part number, catch code, ID sticker, etc.) ?
  4. If known, which strategy/mask/operating system/codebase on ECM?
  5. Which Moates.net hardware are you trying to use?
  6. If you are using non-Moates hardware, which?
  7. Which software application are you trying to use?  Which version?
  8. Which definition(s) for your particular vehicle are you using?  Where did you get them?
  9. Did things stop working (i.e. they worked in the past) or have they never worked?
  10. Is this problem something that happens every time (consistent) or just sometimes (intermittent) ?

Troubleshooting: APU1 / AutoPROM

$
0
0

Introduction

The AutoPROM is a complex device and it can be confusing to get up and running.  This guide is intended to get you to the point where you are connecting to a vehicle and able to use its functions.  Before continuing with this guide, make sure you have the computer that you wish to use with the AutoPROM and the AutoPROM itself handy.  For the remainder of this guide, we will use the terms “APU1″ and ‘AutoPROM’ interchangeably.

Basic Connectivity

The AutoPROM uses a USB connection to talk to your PC.  It uses the same FTDI drivers that all of our other products use.  The first step in getting the AutoPROM working is to get your PC to recognize it.

  1. Turn on the computer you want to use with the APU1 and plug the APU1 in to a free USB port.
  2. Follow the instructions in the USB troubleshooting guide to ensure the device is recognized by Windows.
  3. Although it is mentioned in the guide above, make sure the APU1 is using a COM port between 1 and 8!  This is CRITICAL for some older software.
  4. The rest of the troubleshooting guides in this guide will assume that you have basic USB connectivity.

A Visual Guide

The APU1 has a lot of switches that controls how it behaves and it is critical to get the switches in the correct position for the device to work.  The following picture gives an overview of the switches and what they do.  (Click to enlarge)

APU1 Legend Picture

Each way you can use the APU1 will now be discussed.  Refer back to the picture above if you are unclear from the description in each section.

Using the APU1 as a Chip Programmer

The APU1 can be used to program chips.  It functions almost identically to the BURN1/BURN2 products that we sell, using the same software and procedures.

  1. Make sure the APU1 is connected to your PC and has a COM port between 1 and 8
  2. Make sure the 28 pin ribbon cable used for emulation is UNPLUGGED from the unit. Unpredictable behavior can result from the APU1 being directly connected to a ECM using the emulation cable while burning chips.
  3. Make sure the outer horizontal switch is ‘towards the USB port’ position. (APU1 mode. Other position is passthrough mode, identical to ALDU1).  Chip programming software will NOT be able to connect to the AutoPROM unless this switch is set correctly!!!
  4. Fire up TunerPro RT or Flash n Burn software.  Your APU1 should be recognized and you should be able to program chips.
  5. If the APU1 is not recognized by software, try moving the mode selection switch again.  Verify the the USB is being recognized correctly.

Using the APU1 as an Emulator (realtime changes)

The APU1 can be used as a real time chip emulator.  It functions almost identically to the Ostrich/Ostrich2 products that we sell, using the same software and procedures.

  1. Make sure the APU1 is connected to your PC and has a COM port between 1 and 8
  2. Make sure there is nothing in the ZIF socket.  Emulation will NOT work reliably unless the ZIF socket is empty!!!
  3. Make sure the outer horizontal switch is ‘towards the USB port’ position. (APU1 mode. Other position is passthrough mode, identical to ALDU1).  Emulation software will NOT be able to connect to the AutoPROM unless this switch is set correctly!!!
  4. Fire up TunerPro RT or EmUtility software.  Your APU1 should be recognized and you should be able to upload a tune to it.
  5. If the APU1 is not recognized by software, try moving the mode selection switch again.  Verify the the USB is being recognized correctly.

Datalogging while using Emulation at the Same

The APU1 can be used for datalogging while simultaneously performing chip emulation.  When used in this manner it is the most capable tools that we sell for tuning OBD1 GM Vehicles.

  1. Make sure the APU1 is connected to your PC and has a COM port between 1 and 8
  2. Make sure there is nothing in the ZIF socket.  Emulation will NOT work reliably unless the ZIF socket is empty!!!
  3. Make sure the outer horizontal switch is ‘towards the USB port’ position. (APU1 mode. Other position is passthrough mode, identical to ALDU1).  Chip programming software will NOT be able to connect to the AutoPROM unless this switch is set correctly!!!
  4. Fire up TunerPro RT or Flash n Burn software.  Your APU1 should be recognized and you should be able to upload tunes.
  5. If the APU1 is not recognized by software, try moving the mode selection switch again.  Verify the the USB is being recognized correctly.
  6. Next, make double check TunerPro’s configuration for logging.  Start by going to Tools…Preferences
  7. Next, Tab over to the Data Acq. /Emulation tab. (red arrow)  Make sure that “AutoProm/MAFTPro” is selected for Interface Type.

    APU1 tunerpro settings

  8. Make sure you have the correct XDF and ADX file loaded for your vehicle, plug everything in and give it a go!
  9. If you have trouble connecting, check the other switch on the APU1.  Older applications that use 160baud require the in/up ”10k across A-B” setting.  Later TPI, LTI and TBI applications use 8192 baud which requires the switch to be in the out/center =”open between A-B” position.  If you just want to check codes, the down position will cause codes to flash.

Using the APU1 for Logging Only

As you have seen above, the APU1 is a versatile device that can be used for many purposes.  However TunerPro is the only software that knows how to use any of the advanced features of the APU1, so it is necessary to put the APU1 into a “pass through” mode when using other software.  In these cases, the APU1 functions solely as an ALDL logging interface.

  1. Make sure the APU1 is connected to your PC and has a COM port between 1 and 8.  It will be necessary for you to know which COM port the APU1 is using to configure it properly.
  2. Make sure the outer horizontal switch is ‘away from the USB port’ position. (Passthrough mode, identical to ALDU1. Other position is APU1 mode for TunerPro.)  Legacy software will NOT be able to connect to the vehicle unless this switch is set correctly!!!
  3. We’re going to walk through the TunerPro RT configuration steps to use this mode.  Your APU1 will NOT be recognized by TunerPro RT software in this mode.  If you’re not using TunerPro, skip to step 9.
  4. If the APU1 is recognized by software at startup, try moving the mode selection switch again.  Verify the the USB is being recognized correctly.
  5. Next, make double check TunerPro’s configuration for logging.  Start by going to Tools…Preferences
  6. Next, Tab over to the Data Acq. /Emulation tab. (red arrow)  Make sure that “Use Plug-in” is selected for Interface Type.  Make sure “TunerPro Data Acquisition I/O Interface” is selected under the component drop down box.
  7. Then click the “Configure Plug-in Component” box (green arrow).
  8. Make sure that “Standard Serial” is selected (green arrow) and the COM port of your APU1 is selected (blue arrow)
  9. If you are NOT using TunerPro RT, you should be able to start your software of choice and configure it to use the COM port of your APU1 (COM2 in this example)
  10. If you have trouble connecting, check the other switch on the APU1.  Older applications that use 160baud require the in/up ”10k across A-B” setting.  Later TPI, LTI and TBI applications use 8192 baud which requires the switch to be in the out/center =”open between A-B” position.  If you just want to check codes, the down position will cause codes to flash.

“First Edition” AutoPROMs

Very early editions of this unit feature a different switch configuration.

These units have a horizontal switch and a vertical switch.

For the horizontal switch, outbound is passthrough mode and inbound is APU1 mode.

The vertical switch has three positions.  It controls the behavior of the datalogging interface, much like the inner switch on newer models. 10k is the up position, open is the middle position, and short (check codes) is the down position.

Theory: BASIC Tuning Guidelines

$
0
0

Introduction

This article is being written to answer the most basic questions about what to shoot for when tuning an engine.  This is not intended to be absolutely what you must do – it’s intended to be a starting point for those who don’t know any better.

Prerequisitites

This article will assume you have read pretty much all of the Education section, particularly the article on Modes of Operation.  This article will assume you have a spark-ignition reciprocating piston 4-cycle (stroke) throttle-body fuel injected or multi-port fuel injected engine.  (If you aren’t familiar with these terms, click them!)

Basic Setup Guidelines

  • Make sure the ignition system is in good shape before trying to tune a vehicle.  Coil(s), wires, and spark plugs themselves must be in good condition.  Fouled plugs will ruin your day.  Improper heat range or gap will cause ignition issues that will ruin your day.  A rule of thumb is to go one step colder on plugs for every point of compression (i.e. 9.0 -> 10.0) OR half atmosphere of boost (7.75 psi)  and decrease the gap by one third (i.e. 0.045″ stock to 0.030″) for every step colder plug.
  • Make sure timing is correct.  ”Timing” here means BOTH the mechanical connection between your crank and camshaft AND any adjustment of distribtor, CAS, etc. used to mechanically adjust ignition timing.
  • As dumb/obvious as this may sound, you cannot make adjustments on an ECU to fix a mechanical problem. Things like bent valves, damaged pistons, dead coils, defective injectors,  bad sensors, incorrect mechanical timing, etc. are not things that you can fix with a computer.
  • If the engine is operating in closed loop operation, it’s fueling behavior will be determined by the operation of the O2 sensor.  DO NOT TRY TO FIGHT THE O2 SENSOR.  Use the O2 sensor to guide your tuning activity i.e. try to get the ECM to make zero changes based on O2 sensor feedback
  • Do not try to tune WOT using a narrowband (lambda) style O2 sensor, which is the most common type.
  • O2 sensors can “lie” about the mixture.  LARGE camshafts and misfires are the most common culprits for this behavior because Oxygen sensors measure the Oxygen content of the mixture in order to infer lambda.   Large camshafts and misfires both cause “extra” oxygen to be present in the exhaust, which will cause a false lean reading.  If the ECM is operating in closed loop when this occurs, it will generally add fuel when no such trim is required.
  • If closed loop O2 feedback is working against you, turn it off.  If you have closed loop feedback turned off, you should monitor conditions with a wideband.
  • If you are dealing with a volumetric efficiency type system (i.e. TBI/TPI GM and others) it is a good idea to have your VE values resemble reality.  I.e. if you have 180% volumetric efficiency at idle to achieve stoich, this is bad.  Most “hot” naturally aspirated engines will achieve 85-95% VE, *in a narrow RPM range at WOT*  Some older engines with poor cylinder heads and manifolds will struggle to achieve a 80% VE.  Extremely modern engines will often see a peak VE close to 100% in places.  Motors almost always lose VE at low throttle angles/low MAP sensor readings due to pumping losses created by the restriction at the throttle body.  See the Speed Density article for more.
  • If you are dealing with a Ford that uses Load, it is a good idea to make sure your injector size resembles reality so your MAF transfer function and calibrated load values will resemble reality.  The MAF and LWFM articles cover this as well.
  • Looking at  a graphical representation of your tune should be a “pretty picture” not a bunch of noise.  Things aren’t going to be straight or perfectly smooth most of the time or you wouldn’t be tuning it but you should see trends.  It does not matter whether you are talking about a MAF or speed density or Alpha-N setup.  You should see clear trends.  The absence of trends or unexpected reversal of trends can often indicate a mechanical issue such as a fuel pump that has reached its maximum flow capacity, misfires, reversion, etc.
  • For measuring power, your butt dyno is wrong.  Use a repeatable performance measure, i.e. dyno, accelerometer, 1/4 mile track, etc.
  • Use all your senses particularly SOUND when tuning.

Basic Fueling Guidelines

  • Best emissions are generally achieved close or at stoichiometric.  This is generally around 14.7 AFR gasoline, or 1.0 lambda.
  • Best fuel economy is generally achieved between 15.5:1 AFR gasoline (1.05 lambda) and 16.2:1 (1.1 lambda) for port injected engines.  Newer cylinder heads with fast burn characteristics generally do better with leaner mixtues.  TBI setups generally need to run at least stoichiometric or richer.
  • Best power is usually achieved around 0.85 lambda (12.5:1 AFR gasoline) on modern cylinder heads.  Older heads generally require richer mixtures.
  • Forced induction engines run richer, mostly to combat knock.  How much richer will depend on the engine and conditions.  Except in rare cases, there is no benefit to ever running richer than 0.75 lambda (11:1 AFR gasoline)
  • Oxygenated fuels (Q16, E85, E98/Ethanol, Methanol, Nitromethane) require substantially larger volumes of fuel than “regular” gasoline.  If you have an option for stoichiometric ratio, use it.  If not, it is generally preferable to use injector constants / base pulse width modifiers instead of MAF transfer/VE to tune this out.
  • Almost all widebands on the market read in lambda but convert this to an AFR value for gasoline (where 14.7 AFR = 1.0 lambda) to display it.  If you are burning hexane, this is fine.   If you are running any other fuel, think of the desired lambda you wish to achieve and convert this lambda value to AFR gasoline.  I.e. target an AFR of “11.2 :1″ to achieve a lambda of 0.77 with E85 at ~7.4 :1 AFR.
  • Most pump gasoline as of 2012 in the US is at least 10% ethanol, which means that a true stoichiometric mixture is closer to 14.1 than 14.7.
  • Summer and Winter gasoline blends can have dramatically different ethanol contents, especially in colder climates.  Different octanes and brands of gasoline can have a large variation.  Although somewhat outdated, see the gasoline faq for a more in depth discussion of fuel composition and why it matters.
  • If you are tuning the vehicle with closed loop O2 feedback disabled, make sure you tune such that the ECM will not have to make big changes to achieve its targets when closed loop is turned on.  This boils down to shooting for around 14.7 AFR (1.0 lambda) in areas where closed loop will operate.
  • Get AFRs around idle as smooth as possible in open loop without any feedback or idle troubles will happen.  Do not rely on closed loop to maintain fueling at idle.

Basic Ignition Guidelines

  • Your ECU expects the distributor/CAS/other-adjustable-timing-thing to be in a certain spot.  ALWAYS SYNCHRONIZE YOUR TIMING WITH A TIMING LIGHT BEFORE DOING ANYTHING ELSE!@#!#!!!
  • Mechanical factors (mostly combustion chamber volume, shape and design) are the primary factors determining optimal timing requirements.  Optimal timing is often referred to as “MBT” or Mean Best Timing.
  • Most naturally aspirated engines like to run between 24 and 36 degrees of advance @ WOT at RPM-of-peak-HP
  • It is often not possible to achieve MBT due to the engine knocking first.  Knock will destroy even the strongest engine.
  • Higher compression motors need less timing than lower compression motors.  Higher compression motors are more likely to be knock limited.
  • Forced induction motors need less timing as boost increases.  Forced induction motors are more likely to be knock limited.
  • Aggressive camshafts generally let you run closer-to-optimal timing than smaller camshafts.
  • Race gas and higher octane fuels generally allow closer-to-optimal timing.
  • At a fixed RPM, the engine will generally require less timing at higher load.  I.e. more throttle less timing
  • At a fixed RPM and load, the engine will generally require more timing with a leaner mixture.  (One reason to run a slightly richer mix is that you don’t need as much timing to effectively burn it.  There are plenty of exceptions to this and too rich can be a big problem too.)
  • At a fixed load, the engine will generally need more ignition advance as RPM increases until around maximum horsepower where timing requirements generally flatten.
  • Spark at idle is critcally important for maintaining a stable idle and not having stalling issues.  Too much spark will generally result in hunting/surging.  Too little will generally result in stalling or lumpy idle.  Spark control at/near idle is extremely manufacturer (and sometimes even ECM) specific.
  • You can tune ignition timing to some degree by reading plugs but instantaneous acceleration data and/or a dyno while monitoring knock is the best way.
  • The trap speed of a 1/4 mile run will tell you about power output but it will not tell you about specific RPMs, just overall performance.
  • Your “butt dyno” is totally inaccurate.

Dev: Making new datalogging definitions for QuarterHorse

$
0
0

Introduction

Creating definitions for datalogging with the QH is a complicated, involved process.   Regardless of which software is being used, there is a common core set of tasks that need to be done to allow meaningful real-world data to get spit out.

Overview

Before I get into the specifics, it probably helps to understand how the QH works a little better.

The QH sits on the J3 port of the ECM, which is a bus connected to the processor.  On a stock ECU, both the external program memory (RAM) that stores active processor states and the internal program memory (“ROM”) which stores the strategy and calibration are present on this bus.  The QH overrides addresses on the bus allowing the processor to use RAM on the QH instead of ROM native to the ECM.  You can make changes while tuning by modifying the contents of RAM on the QH.  This is the same mechanism that F3/F5/F8 chips use to allow you change the program on the ECM.

The QH also builds a “shadow” copy of external RAM used by the processor by passively observing communication between the processor and RAM over the J3 port.  Where things get complicated is that not all RAM can be observed by the QH – a portion of it remains internal to the processor, unable to be seen by the QH.  Patch code exists to move or copy memory addresses that we care about from memory the QH cannot see to memory the QH can access, allowing you to log these items.  To reiterate – the QH doesn’t interfere or change communication between the processor and RAM on the ECM – it just observes all transactions, building a “shadow” copy of RAM that is used to supply logging data.

A Datalogging Definition, Dissected

In order to understand the software tasks involved in QH communication, we are going to examine a TunerPro ADX for the CBAZA strategy.  Other software follows the same steps to initialize and log from the QH, so you can read between the lines if you’re not using TunerPro.  The TunerPro definition is open so you can download it ( here ) and follow along because the whole initialization and logging process is broken down step by step.

Fire up TunerPro.  Load one of the existing Ford ADX files. (CBAZA.ADX)

Go to Acquisition menu… Edit Definition

Looking at the ADX Header Data, you will see 3 important commands:

  • Connection Command (run when you connect to datalog)
  • Monitor Command (run continuously while logging to gather data)
  • Disconnect Command (run when you disconnect)

Next, lets examine the Connection Command closer, as it has most of the magic in it.

Go to Commands… Configure QH for Payload.  This is a Macro command that simply executes a bunch of other commands:

  1. Pause for Data Rate (simple pause to let things settle)
  2. Write Patch Code (modify the ECU program to allow the QH to log all items – more on this later)
  3. Write Patch Response (wait for a valid response from the QH to the code modification)
  4. Config Part 1 of Q (configure the QH to watch the RAM locations we desire – more on this later)
  5. Config Reply to Q (make sure QH gives a valid response to the configure command)

Step #2 writes the patch code needed to move things we care about from private internal RAM to RAM the QH can snoop on.  This patch code is UNIQUE to each strategy.  It must be hand-crafted by someone with knowledge of the internal workings of the ford processor.

Step #4 configures which bytes of RAM the QH is monitoring.  The bytes used are unique to each strategy and are also dependent on how the patch code is written.

Continuing, logging happens by the Harvest Data Macro.

  1. Pause for Data Rate (this controls how fast the QH logs data, in hertz)
  2. Query (retrieve a frame of data, as configured by Config Part 1 of Q command)
  3. Data Packet (retrieve a packet.  fixed size is used here because the same packet is always configured by the Config Part 1 of Q command)

Datalogging values are defined relative to their spot in the packet you’ve requested in the format specified by the Config Part 1 of Q command.  Same deal for bitmasks.  Formulas for turning raw data into real world values can vary but are generally at least somewhat consistent among ECMs of comparable generations.

Summary

If you want to make a datalogging definition for a processor, you’re going to need to:

  • disassemble the code well enough to pinpoint RAM locations for things you care to log.
  • For any items that are stored in ram locations 0×0000 through 0×0100 (EECIV) and 0×0000 through 0×0400 (EECV ??? need to verify, may be different for 2 vs. 4 bank.  You can generally tell because private locations will always return the same data), you are going to need to write patch code to relocate these items to blank/unused space.  You can relocate items to either RAM or “ROM” space (because the QH gives read-write access via the J3 port to “ROM” locations stored in RAM on the QH) but you need to make sure NOTHING ELSE IS USING THE ADDRESS SPACE.  If you use RAM or “ROM” that is already in use for other things, you will end up with a processor that does not run properly!!!
  • build a definition including the patch code you’ve come up with
  • create an initialization macro for the QH specifying which RAM addresses need to be included in each data packet, using both stock and patch-code-remapped locations
  • do some analysis to come up with formulas for converting from raw values to real world data
  • build the data values using the formulas you’ve come up with and the packet structure you’ve specified with the QH initialization packet

I know that’s a lot to chew on, but the QH isn’t exactly a simple tool…  You can find more information about QH command structure by reading the Hardware Interfacing guide.  We’re always excited to have more people getting involved in the task of building definitions so feel free to email us if you get confused or stuck.

Memory Addressing – EECIV

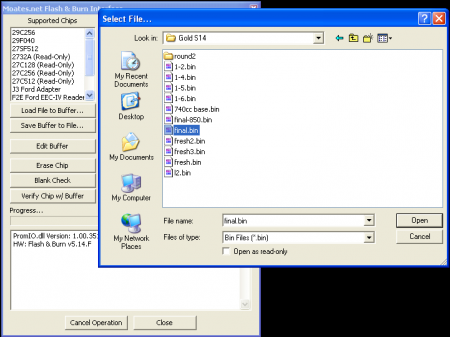
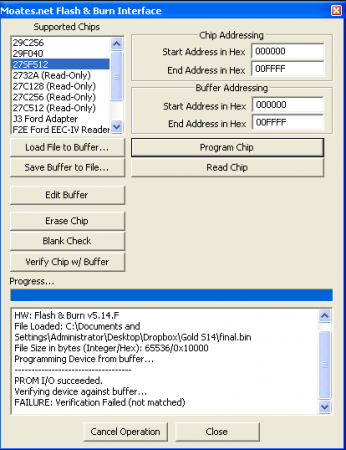
Note: these addresses are for the QH’s addressing scheme.  If you want to use the 16 bit addressing of the ECU, lop off the MSB of 0×03 present in each one.  Ever wonder why chips get programmed from 0×032000 to 0x03FFFF ?

0×03 00 00 – bottom of memory
0×03 00 FF – top of internal 8061 MCU memory
0×03 01 00 – start of xram/others
0×03 1F FF – end of externally addressable memory
0×03 20 00 – start of ROM
0×03 FF FF – end of ROM

This PDF should be very helpful for understanding what is going on. (thanks Tom Cloud)

Tools

CATS Disassembler - a disassembler which can be used for the processor found in EEC-IV

GM: TunerCat OBD2 Tuner

$
0
0

Introduction

TunerCat OBD2 Tuner is a software package that allows tuning of 96-current GM vehicles.  For some early 96-97 vehicles, it is often the only solution. TunerCat OBD2 Tuner must be purchased with our RoadRunner hardware (either with a complete RoadRunner ECM or just a RoadRunner Guts kit)  due to licensing restrictions.  TunerCat OBD2 Tuner also has an optional reflash cable accessory and software (“WinFLASH”) that allows vehicles to be flash programmed over the OBD2 port.  Existing users of TunerCat OBD2 software can use a RoadRunner ECM with the RTOBD2 upgrade.  This upgrade is only available to existing users of the TunerCat software.

Currently (3-26-2012) the TunerCat application suite is known to work under Windows XP, Vista and Win7.  There are compatibility issues with Vista and Win7 that can be addressed. (see below)  Currently, the software supports real time tuning with the RoadRunner on supported vehicles, reading and flashing over the OBD2 port. THERE IS NO BUILT-IN DATALOGGING APPLICATION. You must have a third party logger or scan-tool in order to have an effective tuning combination.  MX Scan used to work with older versions of the TunerCat reflash cable but it is NOT reported to work with current cables.

TunerCat OBD2 Tuner is licensed on a per-VDF (Vehicle Definition File) basis.  You can purchase each VDF individually or as a package including a group (LS1, All) of definitions and hardware together at a discount.  Each VDF generally covers multiple vehicles that use similar engine controllers.  Once you have purchased a VDF, you may tune as many vehicles of that type as you like – there is no per-VIN licensing.

Vehicle Support

The latest list of supported vehicles can always be found here: TunerCat ODB2 VDF files

As of the time of writing (3-26-2012), the following vehicles are supported:


Vehicle Definition
File P/N

Supported Vehicles

Trucks

OBD2_07


1996 – 97 Vortec Trucks (4.3L, 5.0L,
5.7L, 7.4L)


OBD2_06


1998 – 00 Vortec Trucks (4.3L, 5.0L,
5.7L, 7.4L)


OBD2_19

1999 -
00 Medium Duty Trucks (7.4L MFI Gas)


OBD2_03

2001 -
02 LS1 Trucks (4.3L, 4.8L, 5.3L, 6.0L, 8.1L)


OBD2_04

2003 -
05 LS1 Trucks (4.3L, 4.8L, 5.3L, 6.0L, 8.1L)


OBD2_14

2006
- 07* LS1 Trucks (4.3L, 4.8L, 5.3L, 6.0L, 8.1L)


(*only 2007 trucks with old style
PCM are supported)


OBD2_29

2002
- 05 L6 4.2L Trailblazer, Envoy, Bravada


OBD2_50

2007
- 08 V8 Trucks & SUVs (CAN Bus E38 ECM)


OBD2_51

2009
- 12 V8 Trucks & SUVs (CAN Bus E38 ECM except 2011-12 L96 6.0L
Heavy Duty Trucks)


OBD2_52

2007
- 12 V6 4.3L Trucks & SUVs (CAN Bus E37 ECM)


OBD2_59

2008 – 2009 Cadillac SRX 4.6L

2008 – 2012 Chevy Colorado 2.9L,
3.7L and 5.3L

2008 – 2009 Chevy Trailblazer, SS
4.2L, 5.3L and 6.0L

2008 – 2012 GMC Canyon 2.9L, 3.7L
and 5.3L

2008 – 2009 GMC Envoy 4.2L, 5.3L


2008 – 2010 Hummer H3, H3T 3.7L and 5.3L

V8 Cars
OBD2_08

1996 -
97 LT1 Corvette, Camaro, Firebird, Impala

OBD2_09 1997
- 98 LS1 Corvette, Camaro, Firebird
OBD2_01

1999
- 01 LS1 Corvette, Camaro, Firebird


1999 – 2001 Holden

OBD2_05

2002 -
03 LS1 Corvette, Camaro, Firebird


OBD2_20

2002 -
2004 Holden


OBD2_10

2004
LS1 Corvette

OBD2_12 2004
GTO
OBD2_13 2004 – 05 Cadillac CTS-V

OBD2_53

2010
- 12 V8 Camaro / 2009 – 2011 Corvette (except 2011 ZR1)

OBD2_55 2006 – 08 Corvette
OBD2_56 2008 – 09 Pontiac G8 V8
V6 Cars
OBD2_15 1996 Camaro/Firebird
V6
OBD2_16 1997 Camaro/Firebird
V6
OBD2_17 1998 – 1999 Camaro/Firebird
V6
OBD2_18 2000 – 2002 Camaro/Firebird
V6
OBD2_23 1996 V6
Chevy*/Buick/Pontiac* 3.1, 3.4, 3.8L
(*except
Camaro/Firebird)
OBD2_24 1997 V6
Chevy*/Buick/Pontiac* 3.1, 3.4, 3.8L
(*except
Camaro/Firebird)
OBD2_25 1998 – 1999 V6
Chevy*/Buick/Pontiac* 3.1, 3.4, 3.8L
(*except
Camaro/Firebird)
OBD2_26 2000 – 2001 V6
Chevy*/Buick/Pontiac* 3.1, 3.4, 3.8L
(*except
Camaro/Firebird)
OBD2_27 2002 – 2003 V6
Chevy*/Buick/Pontiac* 3.1, 3.4, 3.8L
(*except
Camaro/Firebird)
OBD2_28 2004 – 2005 V6
Chevy/Buick/Pontiac* 3.1, 3.4, 3.8L
(*2004/05 Grand Prix
not

supported)
Transmissions
OBD2_60 2007 – 2012 T42 Transmission
Controller – 4 speed Automatic
OBD2_61 2007 – 2012 T43 Transmission
Controller – 6 speed Automatic

Installation Tips and Troubleshooting

TunerCat OBD2 tuner relies on the same FTDI drivers that we use for the rest of our products.  If you suspect you have driver issues, please consult the USB Driver Troubleshooting Guide.

TunerCat does not always install and run cleanly under Windows Vista and Win7 without specific guidance.

Follow these steps:

  1. If you’ve already run the installers, first uninstall the program.
  2. In order for the programs to install correctly the installation program must be run in Compatibility mode. Before running the setup program right click on it. Select Properties from the list and then click the Compatibility tab. From there, pick the default (Windows XP SP2), click on the ‘Apply’ button and then click on the ‘OK’ button.
  3. Now double click on the setup program to install the program and follow the on-screen instruction to complete the installation.
  4. After completing the installation you’ll also need to set the OBDII RT Tuner program itself to run in compatibility mode. To do so, right click on the OBDII RT Tuner icon on the Desktop, Select ‘Properties’ from the pop-up menu and then click the ‘Compatibility’ tab. On the Compatibility screen click on the ‘Run the program in compatibility mode, select the default Windows XP SP2, check the ‘Run as administrator’ box, click on the ‘Apply’ button and then click on the ‘OK’ button. Then repeat this process or the WinFlash OBDII program.

SocketBooster 1.0

$
0
0

Introduction

The SocketBooster 1.0 exists to provide active conditioning for signals from our Ostrich2.0 and ChipExtender products.  In some circumstances, the logic levels generated by these devices do not meet the specifications of the target device you are trying to use them in.  The SocketBooster remedies this issue by essentially amplifying and conditioning the signal.  In many cases, the same effect can be achieved by using a short emulation cable, such as the 6″ EMUC2806 we sell.

Ostrich 2.0 Trace Feature

The SocketBooster interferes with the data trace feature on the Ostrich 2.0 on an electrical level.   However, one of our users reports that there is a fairly simple modification to get everything working again.  We have not verified this ourselves, but several users have reported success with tracing on a 27C32 application and a SocketBooster.

"The mod to get it going is to cut the CS & OE ribbon cable wires from the
O2, and solder them to the 2732A header on the socket booster via a 330R
resistor."

Applications

The socket booster is REQUIRED for successful use of the Ostrich 2.0 or Chip Extender with 24-pin applications such as the GM TBI OBD1 C3 1227747 ECUs.

The SocketBooster also seems to help out with a lot of applications that use older Hitachi/Mitsubishi processors such as DSM, 8 bit Nissan Z31/Z32/R32, etc.  ECUs of this range are typically in the 84-91 year range.

Signs of Issues

The typical signs that your application may require a SocketBooster are intermittent ECM shutdowns, odd behavior, odd datalogging results, etc. Intermittent (or consistent) flaky behavior.

Installation and Use

The Socket Booster has a single switch on it which controls how the device operates.  The SocketBooster can either boost signals passing straight through it (28 pin setting) or act as a 24->28 pin converter (like the G2 we also sell) with the switch in the 24 pin position.  Although we do NOT recommend this, you can solder a SocketBooster directly into a 24 pin ECM by trimming the two pins closest to the switch and setting the switch to the 24 pin setting.

Nissan: NEMU+Nismotronic Tuning Package

$
0
0

About

The Nemu+Nismotronic Tuning Package is a complete, single-vehicle solution. High-speed datalogging, emulation, onboard storage, and advanced custom ROM options: these features are available nowhere else!

All the necessary ingredients for a complete turnkey tuning package are included:

NEMU Emulation and Datalogging Hardware:

  • Installs entirely within ECU, uses a single USB connection for logging and Emulation (No need for a consult cable!)
  • SUPER fast realtime emulation and logging (Uploads and Downloads)
  • 4MB Onboard Logging capacity
  • 4 Analog input channels for viewing any 0-5v sensor input (wideband, map sensor, iat, egt, oil pressure)

NismoTronic Tuning Software and User Interface:

  • RealTime Tuning and Logging via NEMU RT Boards
  • Onboard Logging via NEMU RT Boards
  • ADC Inputs for Wideband/IAT/ETC via NEMU RT Boards
  • User Definable Live Gauges, Graphing, and Monitor Tables
  • AFR Target Table (Target AFR) and Raw Table (Logged AFR)
  • AFR Difference Table (Difference in Logged vs Target AFR in percentage)
  • User Definable MAF curves! (Create your own custom MAF curve and save it into the MAF Data file to use on multiple tune files with just one click!)
  • Intuitive GUI with visual graphing. Tons of quick keys for quickly editing table values. Interactive 2D Graphing.
  • Innovate, AEM, PLX, and SLC Pure Wideband Support
  • Program Auto Update Feature
  • Import/Export Fuel and Ignition tables
  • Export Data Logs to CSV format for viewing in other programs (EXCEL, Virtual Dyno)

TunerCode VN5 Advanced ECU Firmware:

  • High RPM tuning limit (8012.5 rpm) removed.
  • Single-Table Fuel and Timing Maps.
  • Choice of soft cut or hard cut rev limits. Launch Control. Overboost rev limiter.
  • Soft cut Speed Limit (Can be disabled or set for valet mode)
  • Programmable A/C Compressor and radiator Fan controls.
  • Knock and Dwell control. Startup fuel and timing.
  • Accel, TPS, and CLT Enrichment. Injector size specification.
  • Decel Fuel Reduction, Idle fuel/timing, Fuel Cut control
  • Enable/Disable: Knock Analysis, Closed Loop O2 Analysis, Long Term Fuel Trim (self-learn), TPS fuel map load column contol, EGR, AIV, O2 Sensor Heater, A/C Compressor, etc.
  • Spark cut limiting, in addition to fuel cut limiting.
  • Set Launch uses throttle, tach., and gear shift to set launch rev limit
  • Programmable Outputs (5 trigger parameters, VVL, NOx, Fans, etc.)

Visual Tour

NEMU Package, in the box (click to enlarge)

Box contents: NEMU Unit, Hardware for installation in ECU, Breakout box and cable for extra inputs/outputs, USB bulkhead cable setup with mounting hardware.

NEMU installed in ECU, with one of our NISSAN2CHIP ROM boards sitting side-by-side for size comparison.

Nismotronic software screenshot

Troubleshooting

(Under construction)

Documentation

(Under construction)

Nissan: 20×2 2Chip-64k ROM Board

$
0
0

About

These ROM boards are for Nissans that use a 64k program with a 20×2 header.  These boards require TWO 512k chips such as the C2 SST27SF512 chip that we sell or a 27C512.  They require the same ROM image to be burned into both chips.  They do NOT support switching between ROMs – single program only.  These do NOT work with Nissans that have 32k programs such as red-top S13 SR20DET, S13 KA24DE, etc.  These boards can be used with TWO Ostrich 2.0 emulators for realtime tuning.

Known Applications:

  • JDM “Zenki” S14a VVTi SR20DET w/ WC ECU
  • 95+ USDM Z32 VG30DETT
  • 94+ USDM J30 VG30

Pictures:


Ford Tuning: Injector Scaling

$
0
0

Introduction

One of the most common modifications that require recalibration of the ECM are changing injectors and changing Mass Air Flow (MAF) sensors.

For the rest of this article, we’re going to assume that you’ve already read the articles explaining basic MAF operation and a model for injectors.  We’re going to discuss how to properly change the tune to compensate for new fuel injectors.

You should also take a look at the article on MAF Calibration as they often go hand in hand.

About Injectors on Ford ECMs

Ford uses the concept of injector slopes, breakpoints and battery voltage latency adjustment to cover the behavior of injectors.   Slopes represent the flow of the injector at high and low pulsewidths.  Breakpoints determine the pulsewidth required to switch from the low slop to the high slope.  Returnless fuel system cars add additional compensation tables related to fuel rail pressure.  When changing injectors, it is best to have a complete set of test data.

  • In many cases, injectors purchased from Ford Racing will include all of this information.
  • If you’re using a larger OEM injector (Cobra, Lightning, etc.) you can generally obtain valid data from the OEM calibration in which the injectors were used.  Example SXH1 08 GT500 48#, 01 Lightning CUX2 for 42#, 03 Cobra AMZ2 for 39#, 98 Cobra AOL3 for 24#, etc.
  • If you don’t have complete test data, you can make do.  You will need a wideband.  Recommended procedure:
    1. The rest of this procedure assumes you have a SOMEWHAT sane MAF transfer function.  If your MAF transfer is jacked, you may need to adjust, retune MAF then readjust a few times to get things properly aligned.
    2. Start with the data of the injector closest in size and design to the one you are using (slopes, inj latency, etc.).  If you can’t get any good data on other injectors, then your stock ones will do.  We will call this the “old” injector.
    3. Figure out what the injectors you are installing are rated for (i.e. 24#).  Remember the size of you old injectors (i.e. 19#).  Divide your NEW rated flow by your OLD rated flow.  Make sure your injectors are rated at the same pressure.  24/19 = 1.26 in this case
    4. Multiply both the LOW SLOPE and HIGH SLOPE by the value from above, in this case 1.26.
    5. Set your target AFRs / Open loop targets to a a UNIFORM value.  (i.e. 12.5 for a NA car)
    6. Do a WOT pass on the car.  Observe AFR.  Adjust BOTH high and low slope until actual AFRs resemble the target AFRs you have set up in your tune.
    7. Repeat #6 until the car is as close as possible to what you are commanding.
    8. Let the car idle.  Turn off closed loop if necessary.  Observe AFRs.   Adjust latency (battery voltage table) so that observed AFR is close to commanded AFR.
    9. Drive the car at low – light throttle.  Hopefully, Observed AFRs will be close to commanded AFRs.  If so, skip ahead to #11
    10. If observed AFRs differ significantly from targeted at part throttle, determine how badly they are off.  If they’re really far off, re-adjust in order to get things as close as you can.  After this, make SELECTIVE adjustments to the MAF transfer function at idle in order to achieve targets at idle while maintaining proper operation at light throttle.
    11. Once you have a preliminary set of slopes, latency values it is time to tune battery voltage tables.  First, observe battery voltage and AFR while IDLING.  At idle, the injectors are open the smallest amount of time so changes from battery voltage have the largest effect.
    12. Next turn on headlights, blower motors, brake lights, EVERYTHING you possibly can to put an electrical load on the motor.  Observe changes in battery voltage and AFR.  Make adjustments to the injector battery table in order to compensate for fluctuations.  I.e. if the car goes lean when you turn on the headlights, INCREASE the latency value at the voltage that the ECM reports with the lights on.
    13. Once you have the engine operating in a more consistent AFR range under electrical loan, rev the motor up and make sure that you don’t go too rich when battery voltage increases as a sanity check.
    14. At this point, you’ve probably done a more thorough injector calibration than most tuners will.

Ford: Using our gear with other vendors’ products

$
0
0

Fairly regularly we get asked something along the lines of, “I had my car tuned by Joe Bob at Fast Bob’s Racing and he used a ___________ (not ours) chip.  I want to make a few changes to the tune myself.  What do I need to do it?”

Here is the answer:

  • We do not officially support the use of our products with other vendors’ chips AT ALL.
  • We do not design our products to work with other vendors’ products.
  • Chips from other vendors often work (to some extent) with our products because every chip needs to work on the same ECMs, which means they need to do many of the same things electrically speaking.
  • As a rule of thumb, you will probably be able to use our programmers to *READ* chips from other vendors.  There are times when this does not work.  Do not come crying to us if it doesn’t work.
  • As a rule of thumb, you will *NOT* be able to use our programmers to PROGRAM chips from other vendors.  If it works, it works.  We didn’t intend to make it work.  Do not come crying to us if it doesn’t work.
  • If you want to be certain that you can read, program or erase a chip from another vendor, don’t use our tools.  Use the tools provided by that vendor.
  • If you want to be certain that you will be able to program a chip with one of our programmers, use one of our chips.
  • Bottom line: our programmers are designed and tested to work with our chips.  If you can use them with chips from other vendors, it is purely accidental and we do not support it or encourage their use in this way.

Nissan: NEMU hardware install

$
0
0

Introduction

The hardware portion of the NEMU tuning package requires installation in an ECU to be functional.  This install is NOT for beginners, although it is not extremely difficult with the correct tools.  This article will walk you through the install from start to finish with lots of pictures along the way.  If you still have any questions about the install after reading this, please contact us via email.

Tools

We are going to use the following tools:

  • Cordless screw gun / drill (recommended) or Phillips screwdriver (required)
  • De-soldering tool with vacuum source (required)
  • Hot-air pencil (recommended)
  • Soldering iron with relatively fine point (required)
  • Extremely fine tipped tweezers (recommended)
  • Pick or extremely small flat head screwdriver (recommended)
  • Wire cutters (recommended)
  • Wire strippers (recommended)
  • Heavy duty snips/cutters, small hacksaw, dremel (recommended)

Procedure

  1. Remove both the top and bottom case from the ECU.   You will want to have the ECU on a flat surface so you can apply a LOT of downward pressure before you start to turn the screw.  Nissan ECU screws have some kind of threadlocker on them from the factory and it is VERY easy to strip and/or break them.  We highly recommend the use of a screw gun like the one pictured here.
  2. Find the 20×2 connector where NEMU will attach.  Use your De-soldering Iron to cleanly remove the solder from all 20 holes.  Be careful to not overheat the circuit board and burn up a trace.  ( Click herefor a video of a professional using high quality tools to effectively de-solder components.)

    Cleanly desolder all contacts of 20x2 header

  3. Remove the 20×2 pin header connector and provided solder from the bag included in your NEMU kit.  Push the pin header through the 20×2 holes in the PCB you just de-soldered.  Make sure the alignment keyway faces INWARDS.

    Keyway faces inwards!

  4. Use your soldering iron and the included length of solder to solder all pin connections.

    20x2 header, soldered

    Be careful not to use too much heat, too little heat, too much solder or too little solder.   Click Here for a video of a professional using high quality tools to effectively solder.  Davy Jones’ EEVblog also has a great series of video tutuorials on soldering.  (Part1Part2Part3)

  5. Look at the bottom of the ECU.  Find the surface mount jumper labelled CJ1.  Use your hot air pencil and tweezers to remove and grab it.

    Remove J1

    If you don’t have hot air, you can CAREFULLY use a soldering iron placed parallel to the jumper to melt its solder connections while applying GENTLE pressure to free it from the PCB.

  6. Use your tweezers and soldering iron to re-solder the jumper in CJ2 position instead of CJ1 where it was originally installed.  This enables the 20×2 port instead of stock ECU operation.  If you lose or damage the jumper removing it, you can use a small piece of wire or even a solder bridge.

    Solder CJ2 into place

  7. Take your NEMU circuit board out of its protective anti-static bag and gently install it in the shrouded 20×2 pin header that you have just installed.  This is just a temporary install for fitment purposes – you do not need to fully seat the NEMU at this time.  Treat it carefully.
  8. Now find the 4 pin connector with 4- 6″ wires hanging out of it.

    4 pin connector with wires

  9. For the sake of tidiness, trim off the black wire as it is not used. (This is not REQUIRED but recommended)

    Datalogging header, ready to install with 3 wires

    Note: the position NOT the color of the wire is important.  If your pigtail has a different color wires, pay attention and pick the wire in the same spot in the connector.

  10. Each of the three remaining wires needs to be soldered to a pin on the blue ECU connector.  The wires provided are much longer than they need to be.  We are going to trim the wires so they are closer to the length necessary.  Plug the 4 pin connector into the NEMU board and then move the three wires to the center of the blue connector for sizing purposes.

    Measure...

  11. Make a cut right by the blue ECU connector to get started.  You’ll find that having wires that are almost the right size makes them a lot easier to handle.

    and cut!

  12. The red wire is going to get soldered to the ‘top’ pin closest to the center divider on the left side.  Cut it closer to size.  Remember, it’s a lot easier to cut it shorter again than it is to have to solder two wires together to lengthen it!  If in doubt, leave it longer.  Repeat the sizing procedure for the yellow and orange wires.  They will go to the top and bottom pins closest to the center divider on the right side.  See the following picture of how things will look when they’re done: (The colors look a little funny because of lighting – red on left, orange center lower, brown center upper)
  13. After you have sized all 3 wires, gently squeeze the black locking tab on the connector to remove the 4 pin datalogging connector from the NEMU board.  You’ll find the rest of this procedure is a lot easier with the freedom to move around.
  14. Strip about 1/4″ to 1/2″ of insulation off the end of each wire with a pair of wire strippers.
  15. Using the soldering iron, warm up the strands of each exposed metal wire for a few seconds.  After you’ve warmed them up, gently touch some solder to the wire itself NOT the soldering iron.  When it is hot enough, the wire will wick up the solder.  (this is called tinning the wire.  You can see a pro demonstrate here or here )  You just need a little bit of solder – don’t goop it.  Having the wires tinned will make it much easier to attach them to ECU pins.
  16. I prefer to start with the most difficult wire to solder so there aren’t other wires in the way – I personally think this is the lower connection on the right side, with the orange wire.  Before trying to solder this connection, we are going to bend the tinned end into a ‘U’ shape so that it will “hook” on the pin.
  17. Trim the wire so it is quite short.  You don’t need much of a hook for this technique to work effectively.
  18. Hook the orange wire on the lower pin on the right side.  You may find it is helpful to squeeze or even wrap the tinned end of the wire around the pin so that it will stay on the pin without you actually holding it.  Apply heat to BOTH the ECU pin and wire with your soldering iron for at least 3-5 seconds and then apply solder to the area where the pin and wire are touching, NOT the soldering iron tip itself.  This is a little tricky, but hopefully you should get something that looks like this:

    orange (rightmost) wire soldered

  19. If you like the hook-and-wrap method, you can use it for the remaining two wires.  I’m going to demonstrate a different method that works equally well, especially because we can reach the pins easier.  Let’s grab the red wire next.  Keep the tinned end straight but trim it so it is a similar size to the pin you are going to be soldering it to.
  20. Bring the trimmed red wire to the pin.  Lay it on top of the pin so that they’re on top of each other.  Apply heat to BOTH the wire and the pin for at least 3-5 seconds, usually by placing the tip of the iron on one side of the pair where it makes equal contact with both the wire and the pin.  Then apply solder where the two are touching, NOT to the soldering iron itself – this is usually done to the opposite side that the iron is touching.  This is a little tricky, but hopefully you’ll end up with something that looks like this:

    solid solder connection on red (2nd from right) wire

  21. Repeat the previous two steps for the brown wire, which attaches to the pin above the orange wire to the right of the center divider.  After this, you should have all three wires attached like so: (The colors look a little funny because of lighting – red on left, orange center lower, brown center upper)
  22. Next, we need to modify the case to give the USB cable room to exit.  I used the oval area near where you normally look at the LED to check codes.  I cut the metal case with a large pair of diagonal cutters.
  23. Now would be a good time to firmly install your NEMU board in the 20×2 header and connect the 4 pin black datalogging connector with wires soldered to ECU pins.
  24. Connect the miniUSB->bulkhead cable in your kit to your NEMU board.  For extra safety (i.e. leaving your laptop plugged in and walking off) I generally tie a pretzel knot in the cable immediately before it exits the ECU case so that the knot will absorb any yank or pull.  Use the supplied zip tie to securely attach the USB cable to the case of the ECU.  Once you’ve done this, trim the zip tie for tidiness.
  25. If you’re going to be using the extra analog inputs offered by NEMU, repeat the last step with the AuxBox cable.  This cable has a ethernet/phone jack looking RJ45 connector on one end and a small black plastic box on the other.
  26. Re-install the case on the ECU.
  27. Go to www.nismotronic.com for the lastest software download.
  28. Enjoy your product!

Live Support Session

$
0
0

If you would like a ‘live’ technical support session, where we can take control of your computer remotely to help you walk through  troubleshooting or tutorial exercises, please contact us via email ( support@moates.net ) or phone ( 225 341 3547 ) to schedule in advance. A high-speed ‘wired’ internet connection is preferred for these sessions.  We have done them over phones and MiFi devices but it’s usually frustrating for everyone involved.

gttfd


You will need to click on the link below to ‘Save File‘ and then ‘Run‘ the associated program:

After that, you will be prompted to “Allow shared control of your computer“. Do this, and we can take the wheel to help you!

If you get a message such as  ‘not available’, then you need to speak with us first to be sure we’re scheduled and ready for you.

Once you have finished, you can click on the ‘X’ button in the session manager and remove the file from your computer entirely. Many thanks to our partners at www.dp-tuner.com for helping to provide this service!

Troubleshooting: DORESET, the Demon/Ostrich reset utility

Ford: TunerPro Definitions for QuarterHorse

$
0
0

Introduction

In addition to any definitions you might find on TunerPro’s Webpage or TI Performance‘s webpage, there are also some definitions we maintain. (A little…)  If you are going to try to use the QuarterHorse with any of the strategies on this page with TunerPro, these are the definitions we recommend you use.

TunerPro Defs for QuarterHorse

89-93 Mustang / Cobra GUFB strategy - A9L, A3M, A3M1, X3Z, S0Z, etc.  A9L-GUFB-TunerPro Download (mostly done by Craig Moates, Dave Blundell and ???)

94-95 Mustang / Cobra CBAZA strategy - T4M0, U4P0, W4H0, J4J1, etc. T4M0-CBAZA-TunerPro-Download (mostly done by Cody Hindman, Craig Moates, Dave Blundell and ???)

Test

Tuner Pro RT v5: Using TPRT with QuarterHorse

$
0
0

Introduction

The QuarterHorse Ford tuning tool is supported by TunerPro RT version 5 and newer.  This document will briefly cover the steps necessary for using the QuarterHorse with TunerPro RT.

General Setup

First, the QuarterHorse must have its drivers properly installed.  The QuarterHorse uses the same FTDI device drivers as most of our other products.  Please see the USB Device installation article for more information on installing drivers.  Having the driver’s latency settings set to one will make a difference in how the QH behaves.  Visit the USB Troubleshooting 101 article to for screenshots of how to configure latency in the advanced driver options.

TunerPro Setup

Once the drivers are configured properly, launch TunerPro RT.

TunerPro should make a “beep” to indicate that it found the QuarterHorse and you should see a notice indicating hardware was detected in the lower-left information bar:

If you do not see “Found QuarterHorse vX.XX” go back to the USB troublehshooting guide.  TunerPro will need to have found your QH to continue with this guide.

Next up, we need to configure TunerPro to use the same port for datalogging and emulation.  Go to the Tools menu and select preferences.

Once you are looking at the preferences, select the Data Acq./Emulation tab:

In this screen, there are three options you need to set.  First, choose “Use Plug-in” for the interface Type.  Second, click the “Configure Plug-in Component” box.  Third, choose “Shared With Emulator” and then click OK several times to get back to the main application.

Finally, you need to make sure you have the appropriate XDF and ADX files loaded.  Support for the QuarterHorse has to be made specially for Ford definitions.  You can find the latest definitions that we maintain here or browse TunerPro’s website for others.


Moates hardware works with TunerCat OBD1 Tuner

$
0
0

Our OBD1 tuning products ( AutoProm, ALDU1+CABL1, BURN2, Ostrich) will work with CATS OBD1 Tuner.  We do not sell this package – this page is provided for information purposes only.  For more information, visit TunerCat.com

Moates hardware works with TTS Datamaster

$
0
0

Our products (AutoProm, ALDU1) work with TTS Datamaster.  We do not sell TTS Datamaster – this page is provided for informational purposes only.  For more information, please see Datamaster’s website.

WinALDL Software

$
0
0

About

WinALDL is software to datalog on GM vehicles that use the old 160 baud rate.  This includes but is not limited to vehicles using a 1227747 and 1227165 ECM.  Most older TBI GM computers will speak this protocol.  WinALDL does NOT speak to newer GM OBD1 vehicles that use 8192 baud communication.

WinALDL is available from http://winaldl.joby.se/

WinALDL was written several years ago.  It will work best on Windows XP or older operating systems, if available.  You may need to use a VM or Windows XP compatibility mode on newer Windows7 systems in order for it to run 100% properly.

WinALDL will work with both our ALDU1 and AutoProm.

Setup

There are a few setup tasks that need to be performed.

  • Ensure that your ALDU1 or AutoProm is assigned a COM port between 1 and 4.  Make sure you choose a port that does not conflict with system resources.  (see USB guide)
  • If you are using the AutoProm, ensure that it is set to pass-through *NOT* AutoProm mode. (see AutoProm troubleshooting guide)
  • On most 160 baud applications, you will need to set the switch to 10k mode on your AutoProm or ALDU1
  • Set the COM port selection in WinALDL to match what it set up to on the USB driver under the control panel.
  • Set the baud rate to 4800 within the WinALDL program.
  • Select the ECM type in WinALDL which matches your ECM.
  • Make sure the ALDU1 is connected to the laptop prior to starting the software.
  • Turn your key off, connect the ALDU1 to the car, and start the software.
  • Turn the car on, it should connect.

EFI Live: Requesting a VIN license

$
0
0

Intro

EFI Live Commercial Scan and Tune comes with two VIN licenses. To tune more vehicles, you must provide us some information when you purchase VIN or stream licenses.

Requesting a New License

  1. Plug in your EFI Live FlashScan handheld to your laptop.  Its display should be lit up.
  2. Double click on the “EFILive V7.5 Tune Tool” icon to start the software.  If you do not have this on your desktop, go to the “Start” menu and find it under the EFI Live program group.
    EFI Live Tune Tool
  3. Go to the “Help” menu and select “FlashScan V2 / AutoCal V2 VIN Licensing…”  help_vinlicensing
  4. We need two pieces of information from here.  #1 – WE NEED YOUR SERIAL NUMBER.  You can click the “Copy” button to copy it to the clipboard.
    copy_serial
  5. Once it has been copied, open up an email to us (or the Comments section of your order) and press Control-V (or right click + select paste).  Doing things this way ensure you don’t make a typo.
    comments_serial
  6. Next, click the “Authenticate” table towards the bottom of this window.
    select_authenticate
  7. On the “Authenticate” tab is another important piece of information we need, the Auth Code.  Click “Copy” to copy the Auth Code to the clipboard.
    copy_auth
  8. Go back to your email to us / comments for your order.  Hit Control-V again to paste your Auth Code
    comments_serial_auth
  9. That’s it!  Go ahead and submit your Serial + Auth with your order.  If you forget to do so, you can email it to support@moates.net

Installing a License Key

After you’ve paid for your licenses, you need to use the information we give you to add them to your EFI Live handheld.

  1. Plug in your EFI Live FlashScan handheld to your laptop.  Its display should be lit up.
  2. Double click on the “EFILive V7.5 Tune Tool” icon to start the software.  If you do not have this on your desktop, go to the “Start” menu and find it under the EFI Live program group.
    EFI Live Tune Tool
  3. Go to the “Help” menu and select “FlashScan V2 / AutoCal V2 VIN Licensing…”
    help_vinlicensing
  4. Decision time: What did you purchase?
    • If you purchased an Upgrade to Dodge (from Chevy only) select “Upgrade” (blue)
    • If you purchased a Stream license for unlimited VINs of a certain type of vehicle, select “Add Stream” (yellow)
    • If you purchased a VIN License(s) select “Add VIN” (green)
      license_options
  5. Look at the email you will have received from us and find the important information.  Activation Code (Red) Number of licenses purchased (yellow)  Total license ount (green)

    moates_license_email

  6. Enter the Activation code you should have received in the box and click “Add”.   If you’re entering VIN Licenses, you need to adjust the license number before clicking “Add”.  To do this:
    • Look at the license screen to the right and count the number of licenses in use currently. (4 in the pictured example)
    • Add the number of licenses purchased to the number of licenses in use
    • Set the ‘License number’ to this value.

      enter_info

  7. You should see a message informing you that the change was successful.
    success
  8. You should see the new licenses available for use.
    success_newlicenses

Beginners: Programming Chips

$
0
0

A lot of the questions we get either via email or on the support line boil down to, “how do I program a chip?”

You asked, we deliver!  This tutorial is going to picture the BURN2 but it applies equally to the BURN1 and APU1/AutoPROM as well.

Step by step:

  1. Get out your burner and a chip.  Our burners will work with the SST27SF512 chips we sellstart
  2.  

  3. Plug the burner in to your laptop’s USB port.
  4.  

  5. Install the chip per directions printed on the burner – the unused pins should be closest to the metal handle.  The divet on the chip used to mark pin 1 should also face the metal handle.chip_orientation
  6.  

  7. Fire up our Flash n Burn software.  (If you do not have Flash n Burn, see here)open flashnburn
  8.  

  9. Assuming that your drivers are loaded and your hardware is working, you should see this screen after the software loads:
    hardware found
    If instead you see something like this:
    no hardware detected
    “No Hardware Found” means that you should see the BURN2 troubleshooting guide,
  10.  

  11. Next, select the chip type from the list in the upper left hand corner.
    ( 28 pin = SST27SF512 *OR* Jaybird/BURN2+FA with F3 chip = J3 Ford Adapter)
    chip type
  12.  

  13. Chips need to be be blank before you program them.  Click “Erase Chip” and then “Blank Check”  This will erase the chip and then perform a check to see if it is blank.  If it succeeds, you should see this:
    chipblank
    If you see this instead:
    chip not blank
    Try another chip.
    If your burner fails to erase several different chips, you probably need to send it back for service.
  14.  

  15. At this point, you have a blank chip correctly inserted in your burner with the correct chip type selected.  The next step is to load the file you want to program to the chip.  To do this, click “Load File to buffer” and then point it at the file on your PC that you want to program.
    select file
  16.  

  17. Double check the addressing settings.  In most cases, the software will automatically set these for you.  These settings are important because most of the chips used in ECUs are a smaller capacity than the chip you are programming.  You need to make sure the program you put in the chip ends up in the top (end) of the chip, so these settings matter.  A short list of chip addressing settings: 
    • 64k bin: 000000 start 00FFFF end ( SST27SF512 chip )
    • 32k bin: 008000 start 00FFFF end ( SST27SF512 chip )
    • 16k bin: 00C000 start 00FFFF end ( SST27SF512 chip )
    • 4k bin: 00F000 start 00FFFF end ( SST27SF512 chip )
    • 56k Ford EECIV bin: 032000 start 03FFFF end ( Ford F3 chip )
    • 256k Ford EECV bin: 000000 start 03FFFF end ( Ford F3 chip )
    • 112k Ford EECV bin: SPECIAL need other software ( Ford F3 chip )
    • 216k Ford EECV bin: SPECIAL need other software ( Ford F3 chip )

    check_settings

  18.  

  19. Click “Program Chip”  You should see a progress bar march across and then the software report “PROM I/O succeeded.”
    program successful
  20.  

  21. Now click “Verify Chip w/ Buffer”  This will read the contents of the chip back and check them against the program you have loaded in the buffer.  If this test passes, you can be confident that the chip was programmed correctly.  You should see: “SUCCESS:Verification Succeeded” as the message reported back.verify good 
    If you see this, you are DONE and the chip is programmed correctly! 
  22.  

  23. If instead you see “FAILURE: Verification Failed (not matched)” you will need to do some troubleshooting:verify bad
    • Check and make sure the chip is inserted firmly in the socket. Remove it and re-insert it to be safe.
    • Re-erase and blank check it. If it passes a blank check, try programming it again.
    • If it fails the blank check, try another chip.
    • Try another chip
    • If you’re still having trouble, contact us.
Viewing all 191 articles
Browse latest View live


<script src="https://jsc.adskeeper.com/r/s/rssing.com.1596347.js" async> </script>